
Take a tour of the customer profile
Get to know the functions of the customer profile.
Last Updated:What's in this article?
Jump ahead to a specific section by clicking the links below:
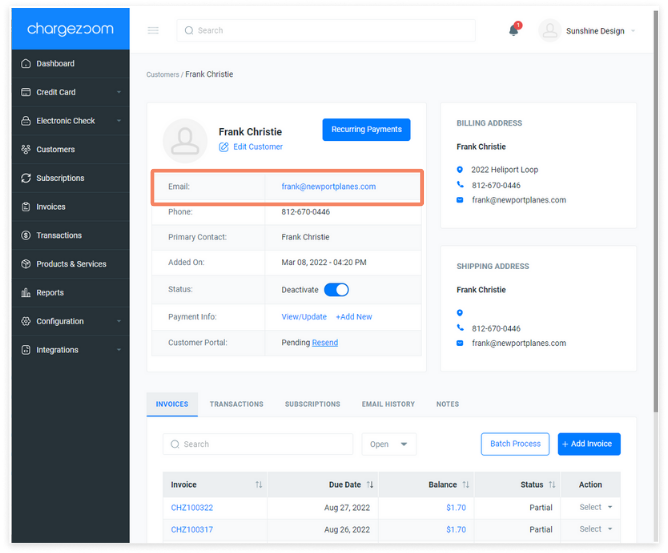
Clicking on the customer's email address will open a new window.
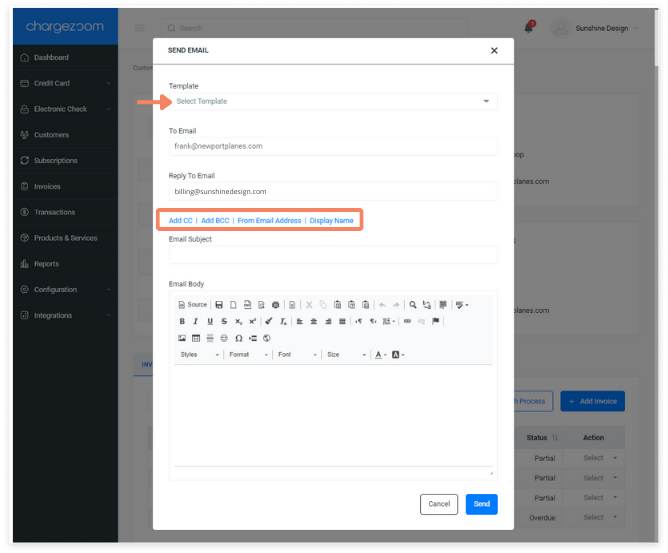
In the Send Email window, you can opt to use an email template that you have already customized. Select a Template from the dropdown menu.
You also have the ability to
- change the Reply To Email
- Add CC
- Add BCC
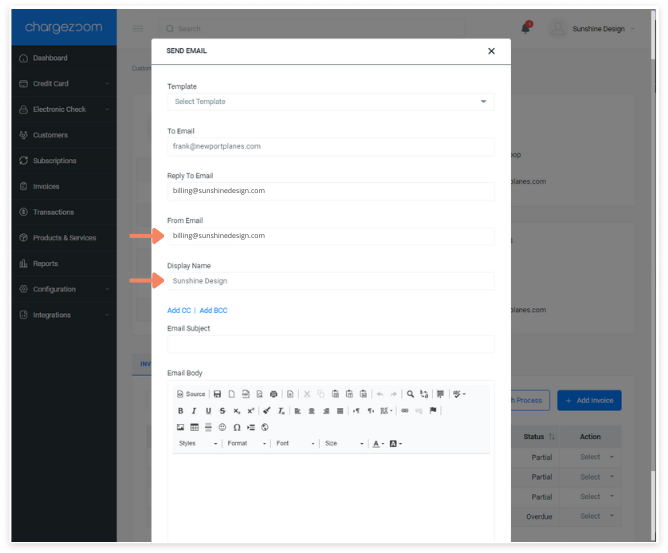
- change the From Email Address
- change the Display Name
Your company email and display name will pre-populate as the defaults in the From Email and Display Name fields, but these can be overwritten when sending an individual email message.
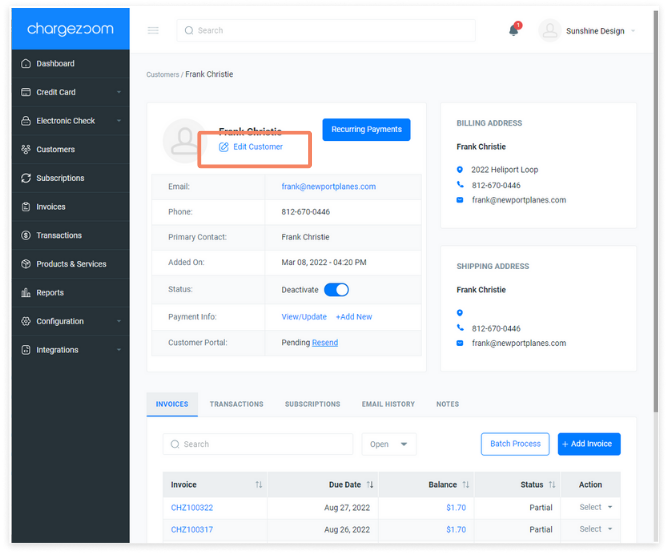
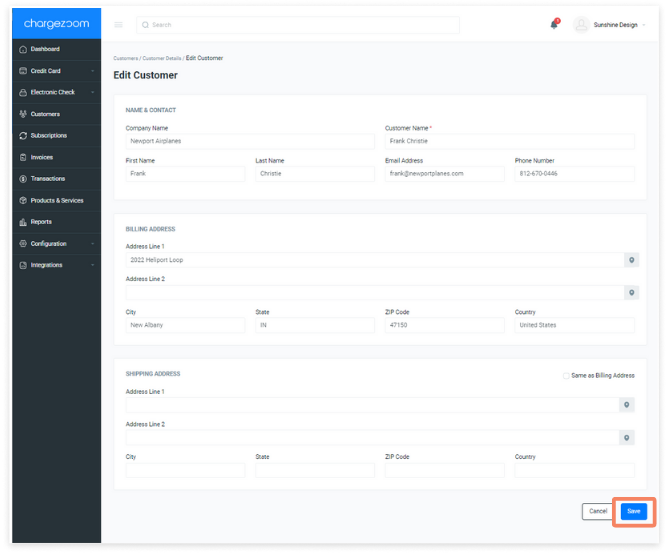
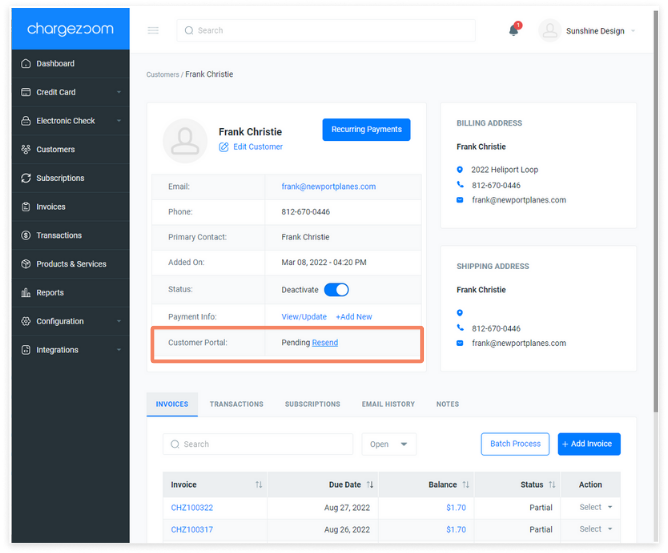
Click on Edit Customer to update the customer's contact details. This includes name, phone number, email address, billing address, and shipping address.
Added On will show you the date and time that the customer was added to your accounting package or Chargezoom.

You can change the status of a customer to Active or Inactive with a simple click. The status is synchronized with your accounting package.

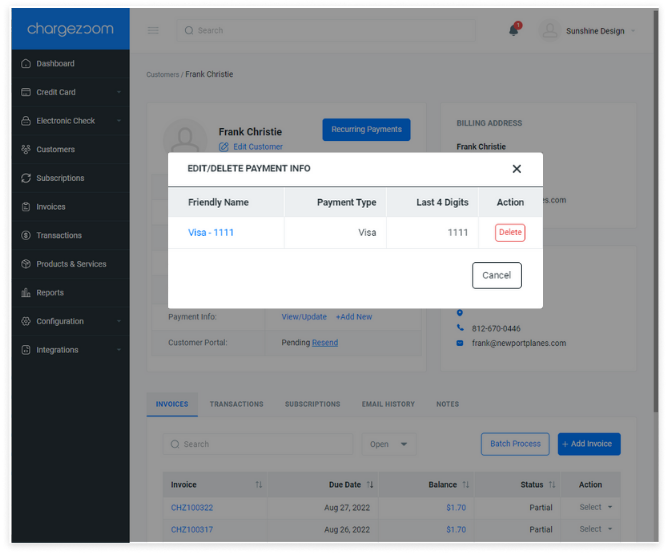
💡 Did you know: all of your customer payment information is stored in a secure vault? Chargezoom will only display tokenized details like the card brand name and the last 4 digits.
You can edit/update a customer's payment information that is saved to their profile. Simply click View/Update.

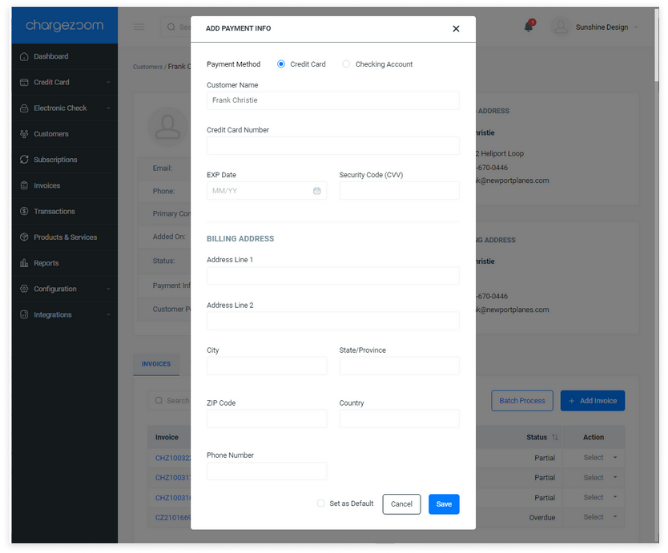
💡 Did you know: Chargezoom allows your customers to store multiple forms of payment? Storing multiple credit cards makes it quick and easy for your customers to choose the right card when paying their invoices.
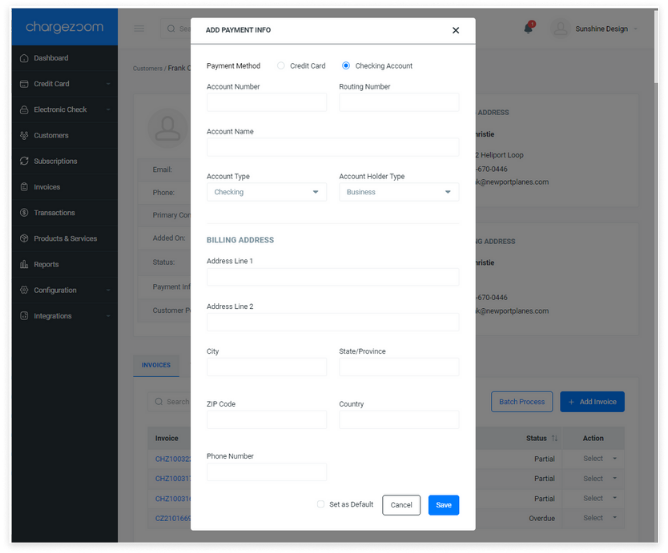
In this same section, you can also add new forms of payment to a customer's profile. Simply click +Add New. Here, you can add credit cards, debit cards, or checking account details.
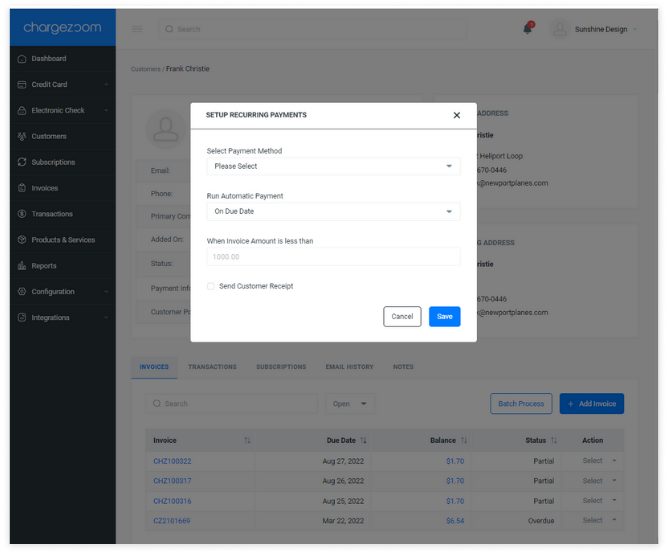
Easily set a recurring payment for an individual customer. Simply click the Recurring Payments button

Next, select the Payment Method
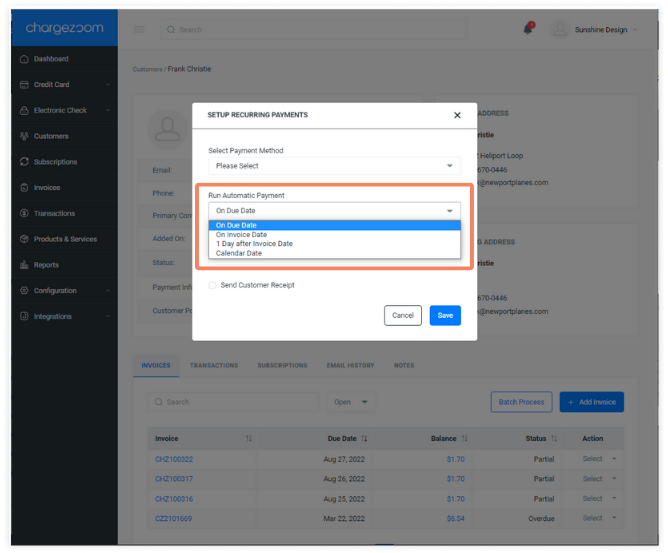
Then you can define when to run the automatic payment. You can select from On Due Date, On Invoice Date, 1 Day After Invoice Date, or on a specific Calendar Date.
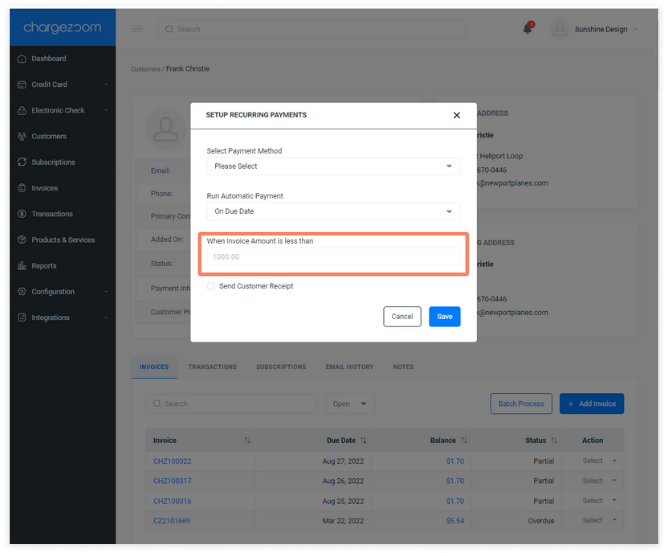
Finally, select a threshold amount for the payment. You can define the upper limit of the Invoice amount to automatically be paid.
The Customer Portal section will show the status of the customer's access to the Customer Portal. See the full details on all status types and enabling the Customer Portal here.
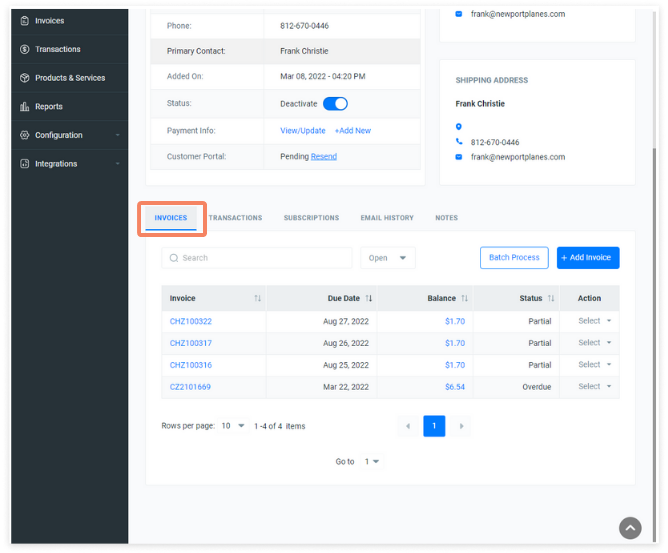
On the Invoices tab you can easily view the status of all of your customer's invoices.
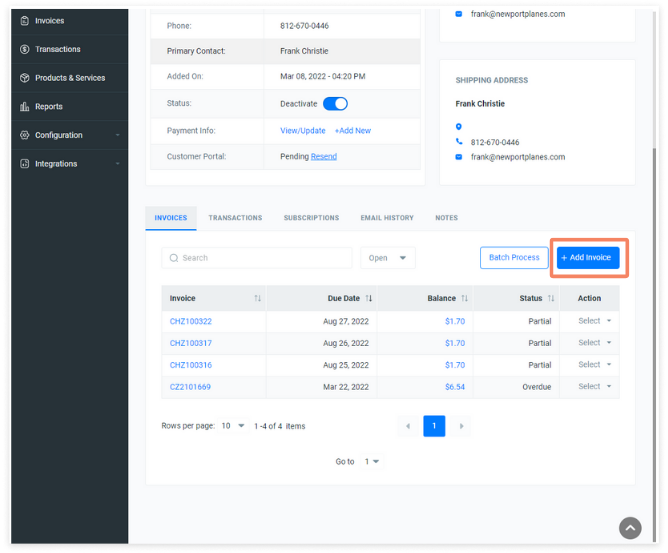
To create a new invoice click +Add Invoice
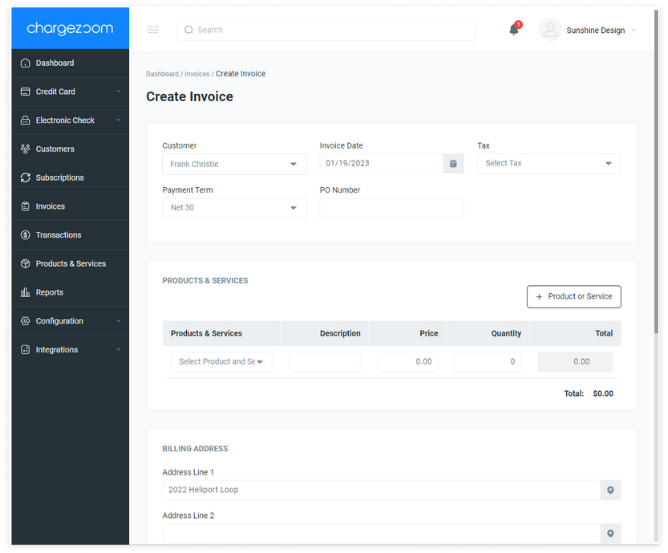
An invoice template will open and you can enter all of the relevant details here.
The Invoices view also allows you to use Actions. In the Action column, click the dropdown menu to view all options.
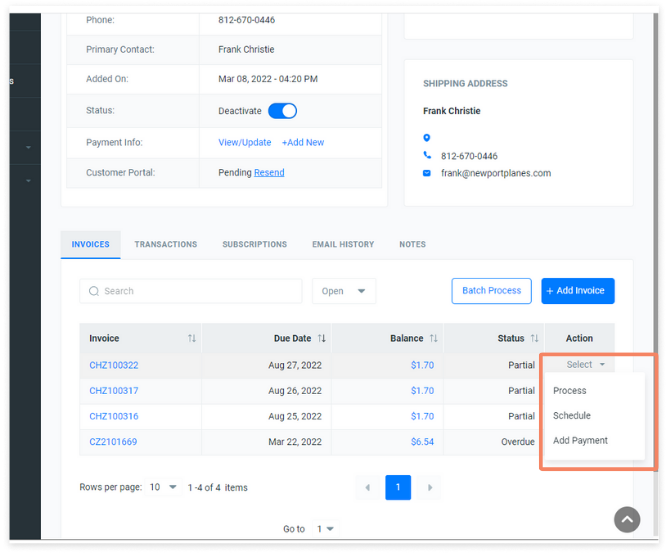
Process and pay an invoice directly from the Action menu.
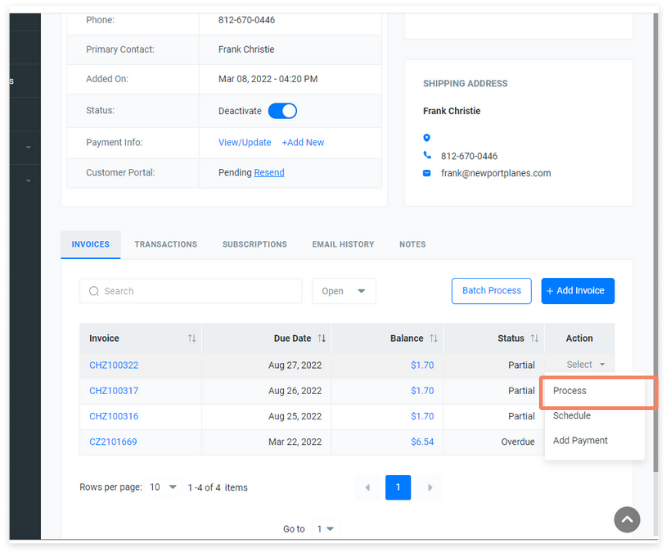
When the Process action is selected, a pop-up window to Process Invoice will appear.

If an invoice should be scheduled to be paid on a specific date, choose the Schedule action.
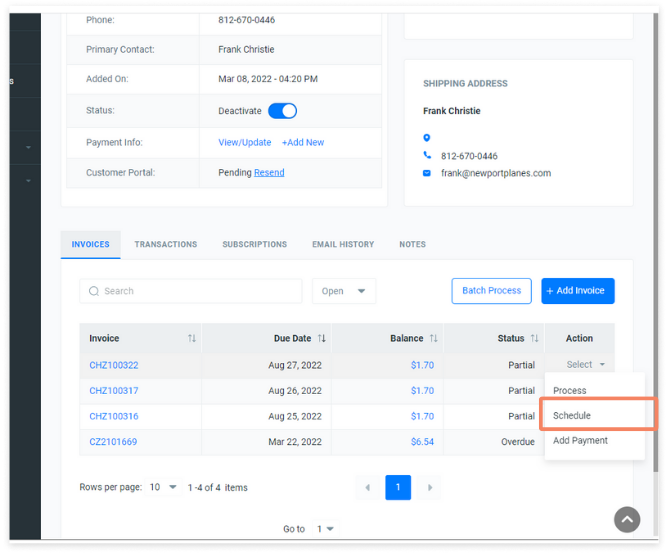
A Schedule Payment menu will appear. Select the date and payment details and save.

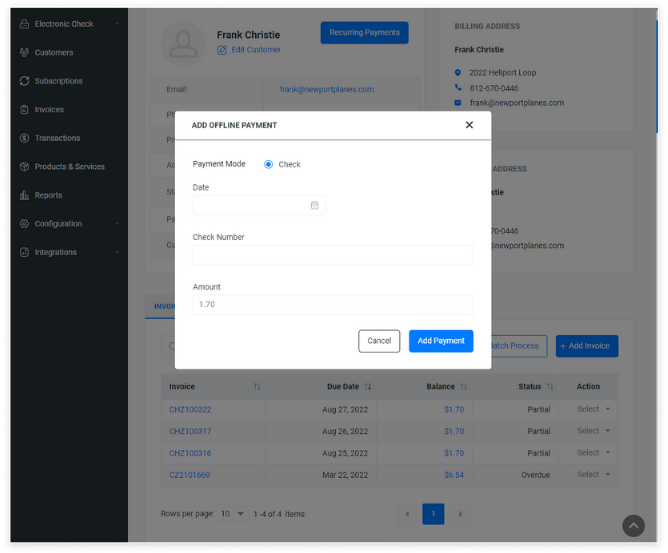
If an invoice was paid using an offline payment source, such as a paper check, choose the Add Payment action.
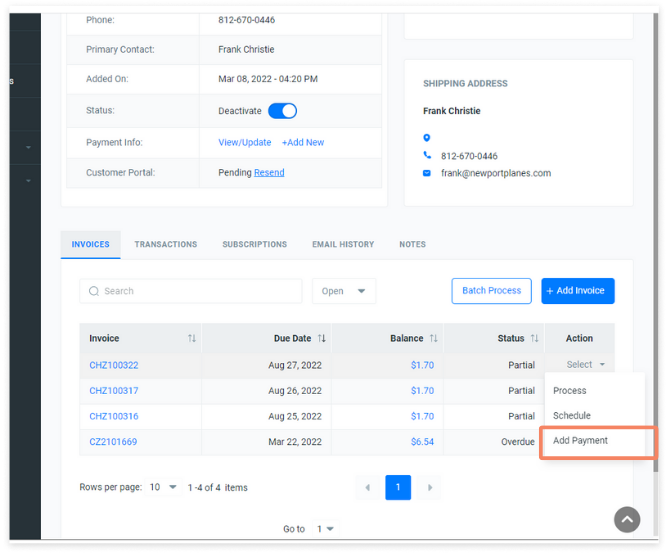
The Add Offline Payment window will appear. Fill in the relevant details and click the Add Payment button to save.
If you would like to process multiple invoices for the customer, click the Batch Process button.
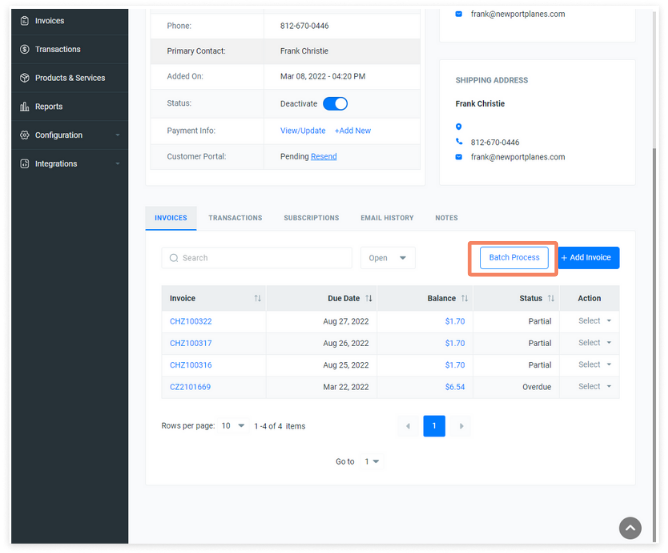
💡 Did you know: the top left checkbox in any list view will select ALL records on the screen?
The Process Invoices window will appear. Click the checkbox to the invoice(s) that you wish to process payment for. If your customer has payment methods stored in their profile, a dropdown menu of options will be shown. If a customer does not have a payment method stored, an entry form for Credit Card Number will be displayed.
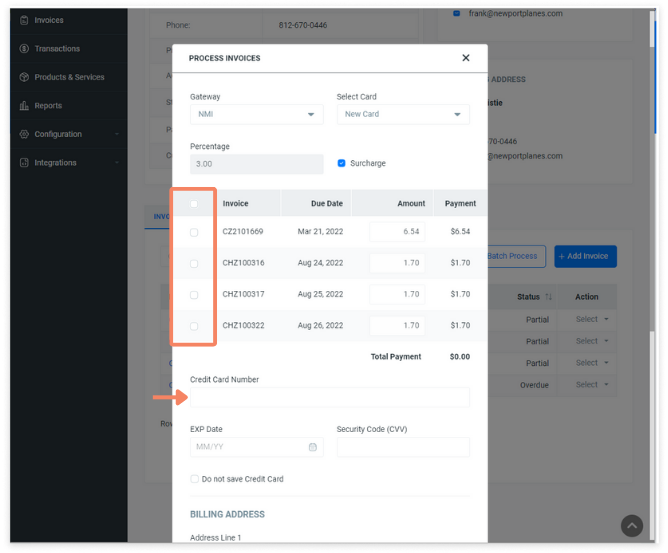
You can opt to apply a Surcharge to any invoices being paid by an eligible credit card. If your business has Surcharging enabled for all invoices, this box will be checked by default and include the determined amount.
💡 Did you know: Chargezoom's compliant surcharging ensures that only eligible credit cards will be surcharged? Read more here.

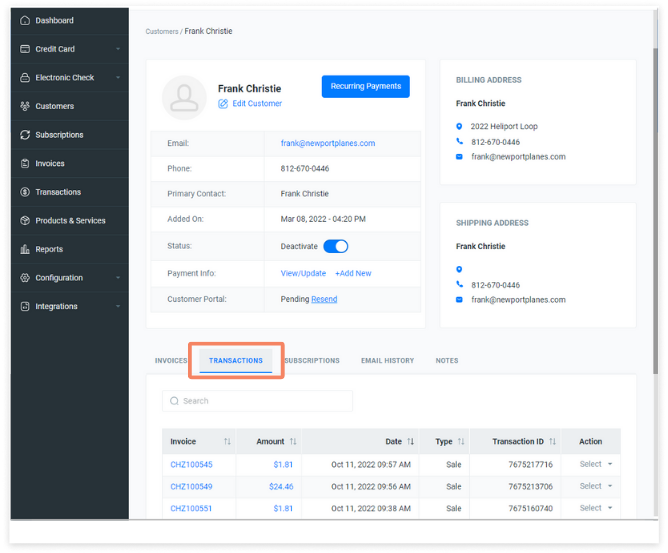
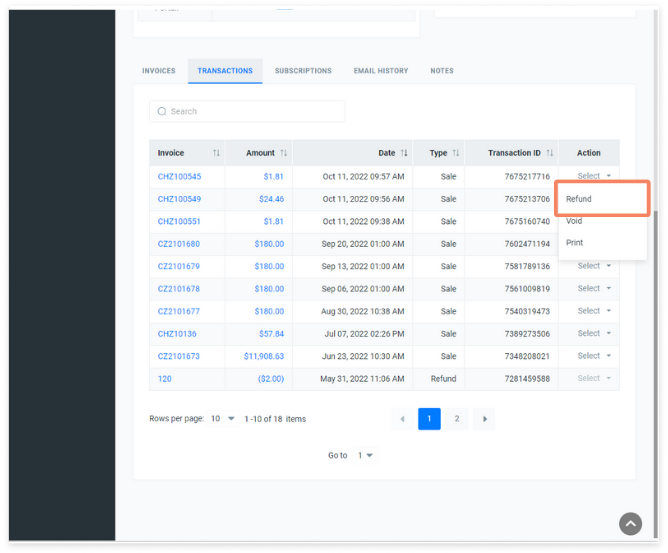
The Transactions view will display all of your customer's prior transactions.
In the column for Action, you can review transaction details.
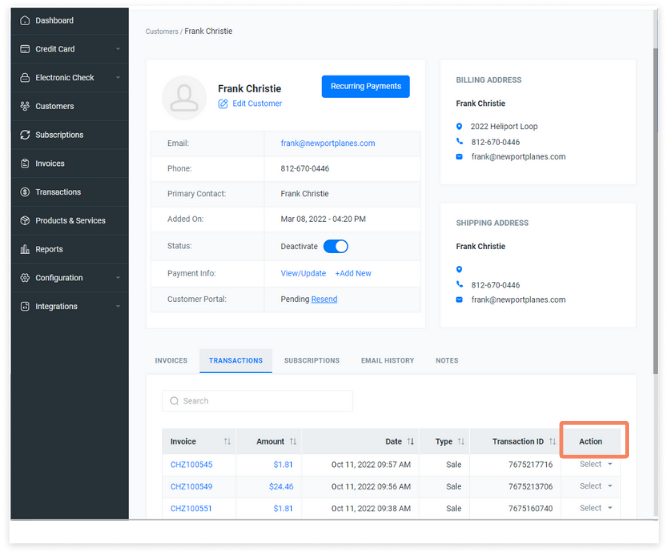
To issue a full or partial refund to a customer, simply click Refund from the dropdown menu.
The Refund Payment window will appear. Enter the amount to be refunded and click the Refund button.

To Void a transaction, click Void from the dropdown menu.
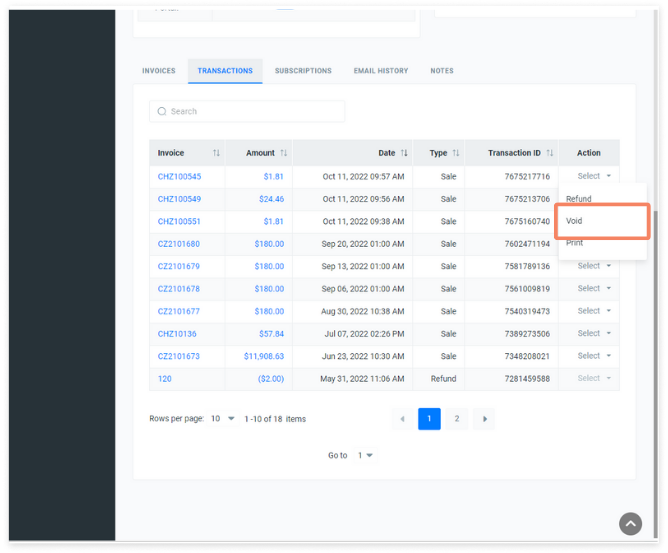
💳 Payments are generally settled at the end of the day, but the exact time of day is determined by the agreement that you have with your payment processor. If you need to confirm the exact time or edit the time that your payments are settled, you will need to reach out to your merchant account provider.
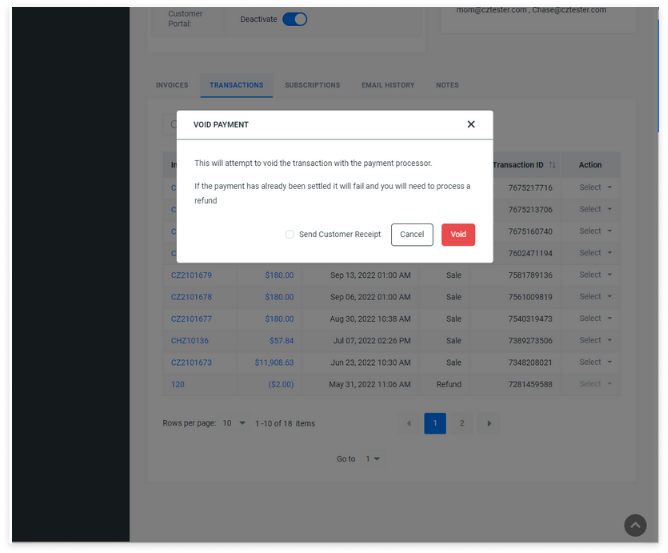
The Void Payment window will appear. A Void can only be processed if the payment has not been settled. If the Void fails, you will need to process a Refund to your customer. See Refund instructions here.
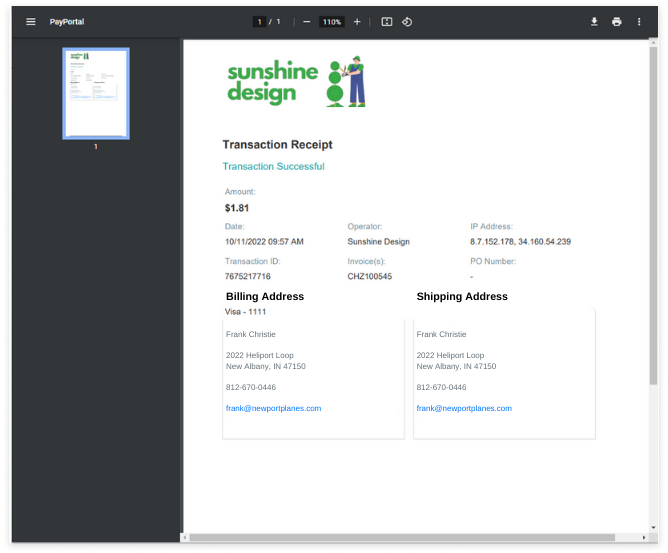
If you would like to print a copy of a transaction record, choose Print from the dropdown menu.
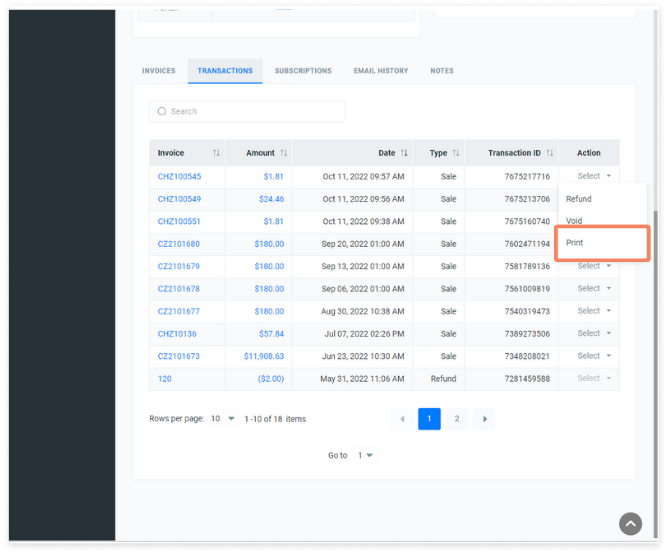
From this window, you can view the transaction receipt with all of the relevant details. This can be downloaded as a PDF or sent to a printer.
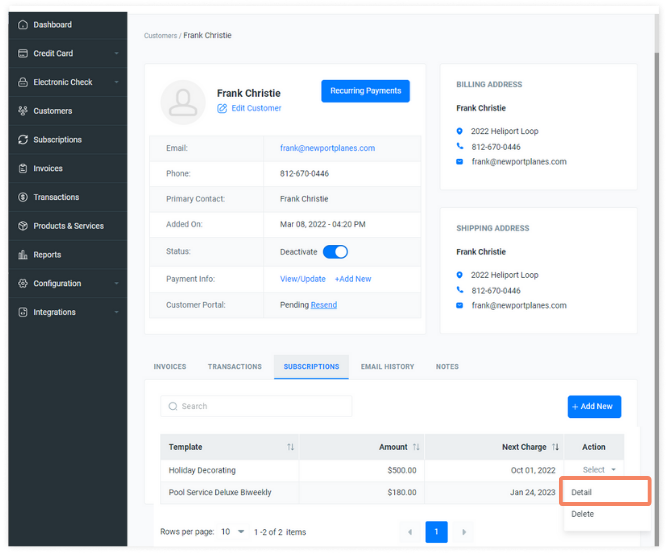
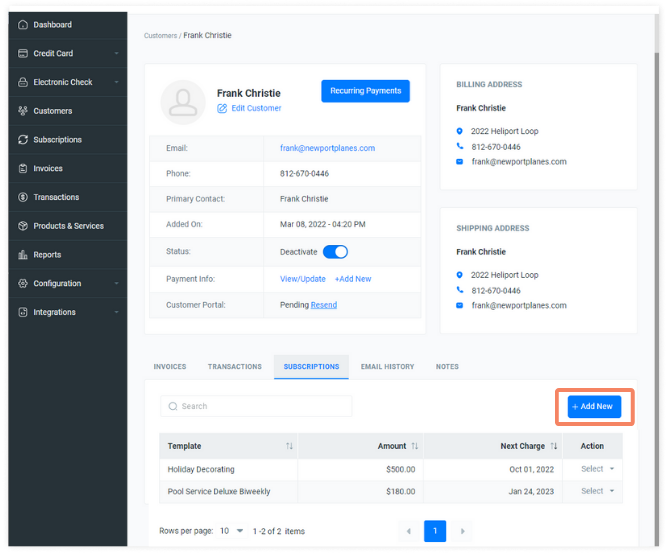
The Subscriptions tab will display all subscriptions that your customer has enrolled in.

In the Action column, select Detail from the dropdown menu to view.
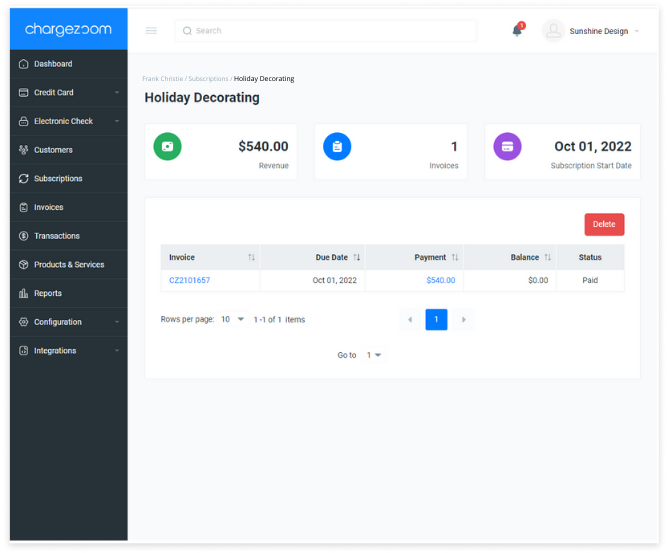
The details for the subscription will be displayed. Here, you can view the Subscription Start Date, Revenue, number of Invoices, and Status for payment.
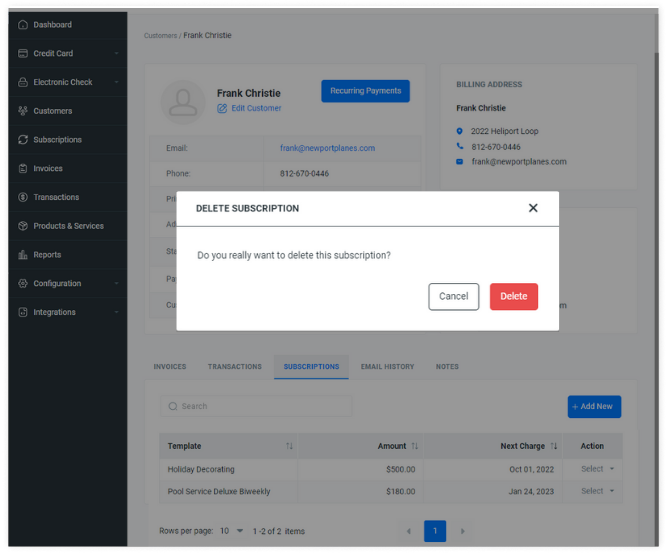
From the Action column you can also choose to Delete a subscription.
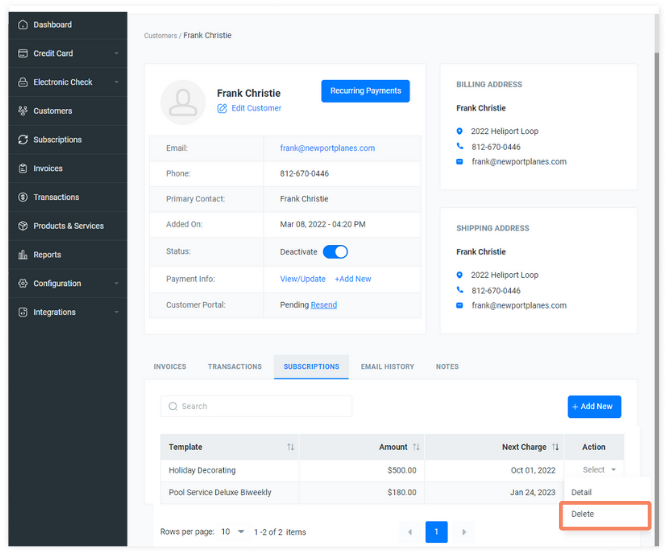
The Delete Subscription window will appear to confirm your choice.
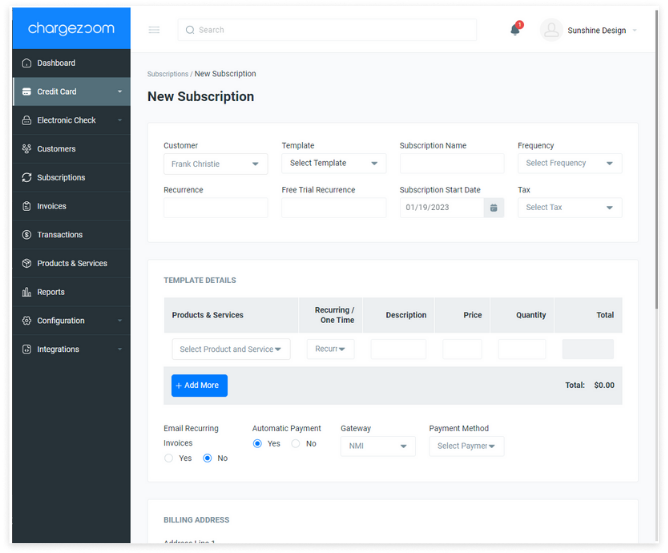
To enroll a customer to a subscription, click the +Add New button.
On the New Subscription screen, you will identify which Subscription Template to enroll your customer in. You can also modify the Products & Services, payment schedule, payment method, and more.
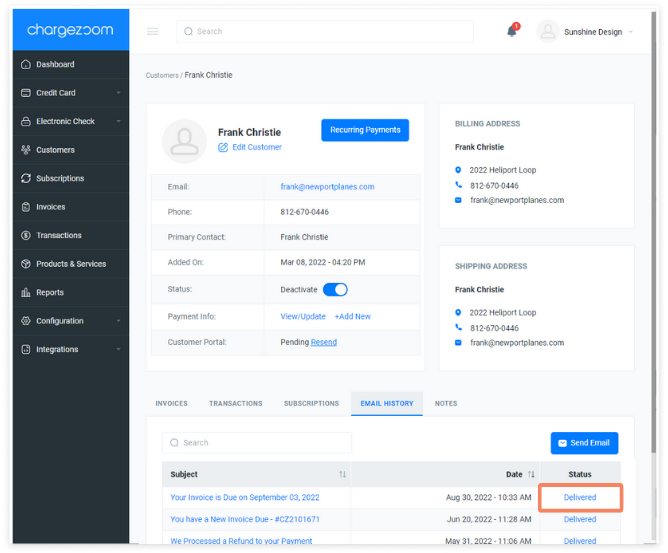
The Email History tab will display all of the email messages that have been sent to this customer through the Chargezoom platform, including any automated emails, receipts, and reminders.
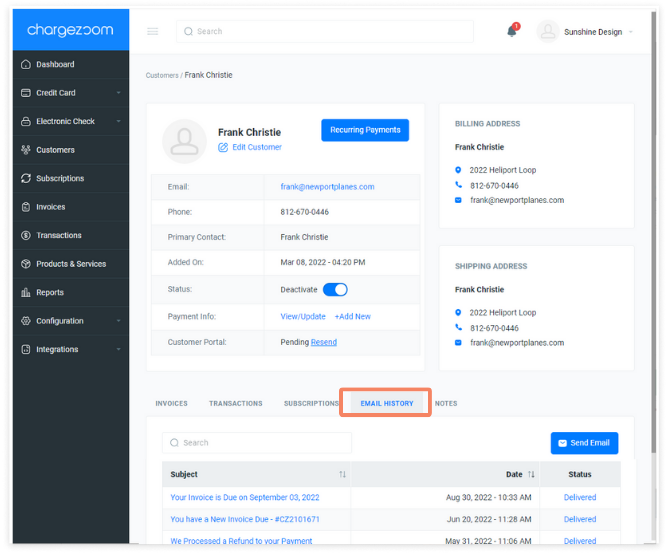
In the Status column, the status for each email is displayed. Clicking on the blue hyperlink text will open additional details.
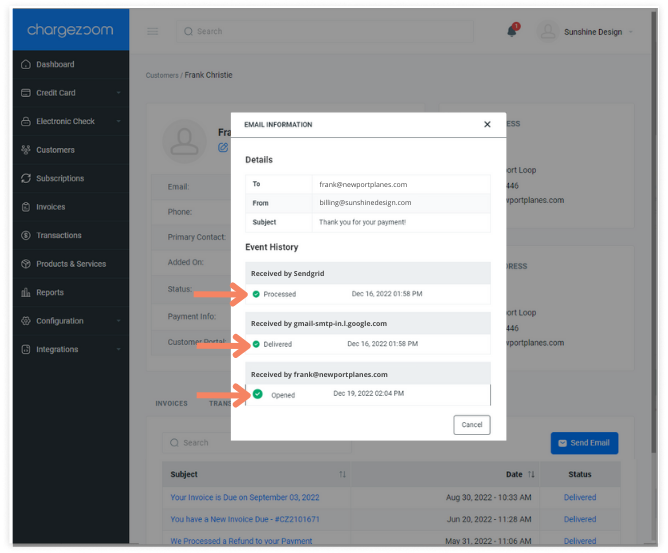
The Email Information window will appear and displays the history of the individual email.
- Received by Sendgrid - this is the date and time that the email server processed the outgoing email
- Received by email provider - this field may look different between customers. It will display the name of the email network that accepted the email and the status.
- Received by email address - this field will only appear if your customer has Opened the email message. The record will be appended if the email is opened multiple times.
👍 Pro tip: viewing whether or not a customer has opened an email can be used as part of your collections strategy. Read more here.
The Notes tab will store any private notes about your customer. These notes will not be visible to the customer.
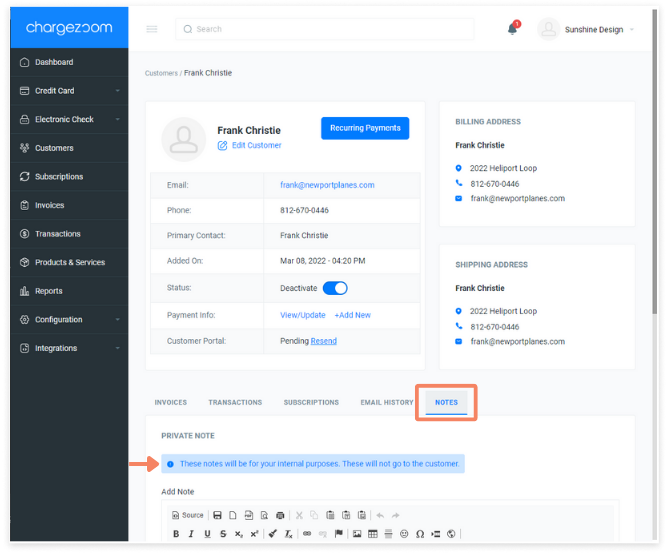
The Notes History gives you a complete view of all notes that have been added and include who added the note and when it was added.
